This post we'll discuss connecting copper to galvanized pipes. And maybe some soldering too, if I feel like it. First off, let me say that I HATE plumbing too. But, it's my least-impressive skill so I figured that the one silver lining of having fcuked up plumbing is that I would practice at my place so that I can tell plumbers that they are full of shit when they try to overcharge me on future projects. Knowing what you are doing is powerful mojo because plumbers, like predatory animals, can sense fear and will rip your wallet out of your ass if you show any weakness. Anyway, here are some tips I picked up along the way (from people who are good at it, or from trial and error).
 Here is my way (a/k/a) the right way to work with solder. Bend the end of it to make it easier to work with. Since you are going to apply the solder to the far side of the joint, bending it like this will let you get behind it easier.
If it's a 3/4" pipe, make the little piece 3/4" long, plus a little more. That way you have enough solder for the joint, but not too much to over-solder it and make a mess. If you put too much solder, it will work, but you probably can't brag about it with pics at work.
 Here is my basic plumbing kit. The most important things in there are probably the fire extinguisher (can't be too careful) the leather gloves (molten metal is not like moisturizer), the safety glasses (which I admit I don't always use because I never remember where I left them) and the heat shield (that black cloth). Sometimes I see people on TV solder without a heat shield. There's a word for people who use welding torches without a heat shield: Arsonists.
Always use a heat shield. In a pinch, you can use a crushed beer can (plenty of those around any construction site) or any other two layers of metal. (by the way, that's the hardwood floor that my brother and I put in...we rock!).
And here is how you reconnect a radiator (to copper pipes) if you, errrrr, I mean if someone accidentally breaks off a fitting inside.
 So when I tried to take this fitting out, it broke inside somehow. I'm not really sure how it happened and I'm not here to point fingers, so let's leave it at that. To get the old fitting out, I cut the inside with a reciprocating saw (being careful not to cut the threads of the radiator) in a couple of places then banged the fitting with a hammer with a hammer to get it out.
Here is my trusty reciprocating saw. The second best $20 I ever spent.
I don't know why the pics got bigger all of a sudden. I know nothing about computers, so pretend they look normal sized.

Here is a simulation of me and "the persuader" getting the broken fitting out.
 Be sure you put a rag inside the radiator before you start banging. If the pieces fall inside your radiator, then you got problems. It's not a radiator anymore, it's a gigantic paperweight.
 Okay, here is what the piece that broke off looks like. The broken pieces are what was stuck inside the radiator.
 Okay, so here is where I fixed that giant hole in the floor from my previous plumbing lesson. I capped off the radiator pipe, but mad it high enough to keep my options open when I reconnected the radiator.
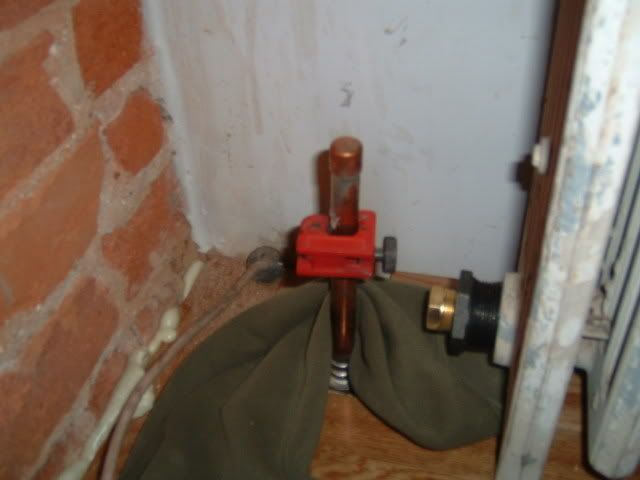 This is a mini tubing cutter. You use this when a pipe is too close to the wall to use a regular tubing cutter. And put a rag on the floor in case there is any water there. I learned THAT the hard way...several times.
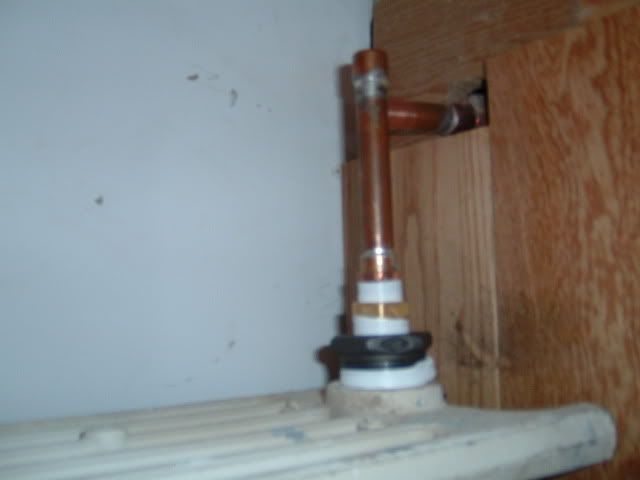 I put some wood under the radiator (in case the next owner wants to do away with the radiators, the floor underneath won't be scratched/damaged by the weight of the radiators.
then you line up the pipes you want to connect, mark them and cut them.
There are 3 ways to connect galvanized pipes to copper.
- Connecting the galvanized directly to copper: this works for a few years then you have leaks everywhere. Don't do it this way.
- Connecting galvanized directly to copper, but using a lot of teflon tape in between: actually, this works really well. The barrier between the copper and galvanized is about the same distance as in a di-electric union, so if I wasn't posting these pics to show off, I might do it this way.
- A di-electric union: This is a special fitting with a piece of plastic between the copper and galvanized. I don't like these...at all. A lot of places (home depot) never have these and you gotta go all over town looking for them, and they usually never have the right size so you end up using a couple of extra copper/galvanized pieces on either size to get it down to the size you need. Adding more connections means more places where the pipes can leak.
- Using brass in between: Not only is brass nice looking, but it also works the best. Putting brass fittings between the copper and galvanized, will prevent the chemical reaction that causes the leak.
Here is the right way. Seeeeee, there is a black iron fitting (with lots a teflon tape) a brass fitting (with teflon tape) then a threaded copper soldered to the rest. The only thing to be careful of is that brass and copper are much softer than iron/steel, so don't over tighten it.
I didn't get any pics of the finished product before my camera broke, but I'll take some pics for the updates.
9 comments:
Dear Ninja,
Thank you for such a good lesson, it was very instructive. Now I am even more scared of doing plumbing repairs at home, realizing that this skill is totally incompatible with my clumsiness. I could end up damaging my home, burning my hands or wetting my floors (sometimes I do that already, anyway). Next time a plumber comes to help me, he will be able to smell my fear even before I place a call.
I hope that Lesson 2 talks about ways a plumber could deal with his plumbers smile. Either that or how to use ninja skills to avoid direct eye contact with a plumber’s coin slot. Hopefully ninja plumbers don’t suffer from that malady.
Regards,
Startled by cracks
Gui, it's easier than it looks. I'm just paranoid about safety.
Great write up, thanks.
I probably have to do a plumbing job to replace galvanized cold water supply line in my house. The plumber estimated $3500 just to replace the 30 feet pipe! It probably worth the risk to DIY.
I just got a bid of $6100 to replace a water heater. $4k for <1 day of labor and a $25 permit he gets across the street from my house. $2100 for parts which is severly marked up.
I hate texas subcontractors they are such thieves.
clean up your vocabulary please. I tried to read the article, but language is too offensive.
Sheeeiiiiit,,,,, If you don't like the language, feel free to excercise your surfing right to leave the site. I'm guessing you haven't done any plumbing work around the house lately or you'd be talking like this too,,,,,
Very well done! Nice to have all three options on the Brass to Galvanized connection in one spot..
Your comment about the name for any plumber that doesn't use a heat shield is an arsonist is right on: My house burned down last week from an idiot plumber soldering a copper pipe during a renovation a)without a heat shield even though the joint was right next to 100 year old beams and insulation and 2) did not have an extinguisher in immediate vicinity and c) the extinguisher he had was not rated properly for size nor high enough A rating. Plumbers are among the top 10 reasons for home fires each year and my mission is to tell everyone I can to personally ask any plumber doing hot work on their property to a) know the state code of regulations for hot work and b) articulate their fire safety plan including heat shield and extinguisher. I will not let a plumber near my house again until I am satisfied they are not incopmpetent for basic fire safety.
Great instructions, thanks for the article. ron J.
Post a Comment